Material UI는 구글의 Metarial Design을 구현하는 React UI Component Library입니다. React에서 UI Library로 antd와 같이 상위권에 존재하는 Library입니다.
이번 실습은 yarn + vite + React + Material UI로 진행해보도록 하겠습니다.
1. 환경 구성
yarn을 설치해 주도록 합시다. 환경은 아래와 같이 진행합니다.
React - EC2에서 React 환경 구축하기 (2023년 version)
* 목차 1. node.js, npm 설치 2. yarn, vite 설치 3. ec2 network 설정 예전에는 React 시작하려면 npm create-react-app이 대부분이었는데 webpack의 속도 issue와 vite와 같이 훌륭한 Build 도구가 있어서 요즘은 또 트렌
tyoon9781.tistory.com
저는 단순하게 아래와 같이 react project를 만들겠습니다.
yarn create vite . --template react
react sample page가 보였으면 다음은 metarial ui을 설치합니다.
yarn add @mui/material @emotion/react @emotion/styled
이 project는 react를 사용할 것이므로 package.json의 peer dependancies에 등록합시다.
  "peerDependencies": {
    "react": "^17.0.0 || ^18.0.0",
    "react-dom": "^17.0.0 || ^18.0.0"
  }
roboto font도 설치합니다.
yarn add @fontsource/roboto
이 font를 아래와 같이 불러올 수 있습니다.
import '@fontsource/roboto/300.css';
import '@fontsource/roboto/400.css';
import '@fontsource/roboto/500.css';
import '@fontsource/roboto/700.css';
Google 웹 글꼴 CDN을 사용해서 Roboto font를 사용하려면 <head />에 아래와 같은 code snippet을 추가합니다.
<link
  rel="stylesheet"
  href="https://fonts.googleapis.com/css?family=Roboto:300,400,500,700&display=swap"
/>
Icon도 설치합니다.
yarn add @mui/icons-material
Google 웹 글꼴 CND을 사용해서 material Icon font를 사용하려면 <head />에 다음과 같은 code snippet을 추가합니다.
<link
  rel="stylesheet"
  href="https://fonts.googleapis.com/icon?family=Material+Icons"
/>
2. Sample code
Button을 이용한 간단한 app 작성입니다.
// import "./App.css";
import Button from "@mui/material/Button";

const App = () => {
  return (
    <div>
      <Button variant="contained">Hello World</Button>
      <button>Hello World</button>
    </div>
  );
};

export default App;
main.jsx의 css도 끊어줍시다.
import React from "react";
import ReactDOM from "react-dom/client";
import App from "./App.jsx";
// import './index.css'

ReactDOM.createRoot(document.getElementById("root")).render(
  <React.StrictMode>
    <App />
  </React.StrictMode>
);
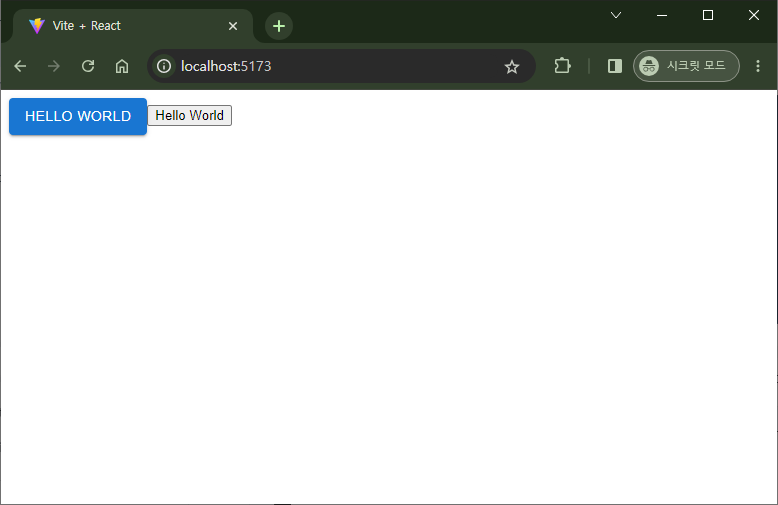
terminal에서 yarn dev를 실행하면 다음과 같은 화면을 볼 수 있습니다.

어때요? 기본 material button이 참 이쁘죠? 이런 맛으로 material ui를 사용합니다.
3. 다양한 component
다양한 Component를 보여드리기 전에 Wrapper부터 작성하겠습니다.
component/Wrapper.jsx
import { CardContent, Card, Typography } from '@mui/material';

export default function Wrapper({
  title = null,
  description = null,
  component = null,
}) {
  return (
    <Card variant='outlined' sx={{ minWidth: 300, maxWidth: 800 }}>
      <CardContent>
        <Typography variant='h4' fontWeight={'bold'}>
          {title === null ? 'no title' : title}
        </Typography>
        <Typography variant='subtitle1'>
          {description === null ? 'no description' : description}
        </Typography>
      </CardContent>
      <CardContent>
        {component === null ? 'no component' : component}
      </CardContent>
    </Card>
  );
}
App.jsx의 Button, Autocomplete 예제입니다.
import { useState } from 'react';
import { Button, IconButton, Autocomplete, TextField } from '@mui/material';
import DeleteIcon from '@mui/icons-material/Delete';
import SendIcon from '@mui/icons-material/Send';
// icon list : https://mui.com/material-ui/material-icons/

import Wrapper from './component/Wrapper';

const App = () => {
  const [selectValue, setSelectValue] = useState(null);
  const [selectedCountry, setSelectedCountry] = useState(null);

  const handleCountryChange = (event, value) => {
    setSelectedCountry(value);
  };

  const handleButtonClick = () => {
    if (selectedCountry) {
      // 선택된 값에 대한 다른 동작 수행
      console.log('Submit:', selectedCountry);
    }
  };

  const renderOption = (props, option) => {
    if (option === countries[countries.length - 1]) {
      // 마지막 항목일 때 버튼으로 렌더링
      return (
        <li {...props}>
          <Button
            onClick={handleButtonClick}
            variant='contained'
            color='primary'
          >
            {option.label}
          </Button>
        </li>
      );
    }

    return <li {...props}>{option.label}</li>;
  };
  const handleValueChange = (event, value) => {
    setSelectValue(() => {
      value;
    });
    console.log(value);
  };

  return (
    <div>
      <Wrapper
        title='Button'
        description={'variant, color, size'}
        component={
          <>
            <Button variant='text'>text</Button>
            <Button variant='contained'>contained</Button>
            <Button variant='outlined'>outlined</Button>
            <Button variant='contained' disabled>
              disable
            </Button>
            <Button variant='contained' color='secondary'>
              secondary
            </Button>
            <Button variant='contained' color='success'>
              success
            </Button>
            <Button variant='contained' color='error'>
              error
            </Button>
            <Button variant='contained' size='small'>
              small
            </Button>
            <Button variant='contained' size='medium'>
              medium
            </Button>
            <Button variant='contained' size='large'>
              large
            </Button>
            <Button variant='contained' startIcon={<DeleteIcon />}>
              Delete
            </Button>
            <Button variant='contained' endIcon={<SendIcon />}>
              Delete
            </Button>
            <IconButton aria-label='delete'>
              <DeleteIcon />
            </IconButton>
          </>
        }
      />
      <Wrapper
        title='Autocomplete'
        description={'options, renderInput, onChange'}
        component={
          <>
            <Autocomplete
              options={top100Films}
              onChange={handleValueChange}
              renderInput={(params) => (
                <TextField {...params} label='select option' />
              )}
            />
            <Autocomplete
              options={countries}
              getOptionLabel={(country) => country.label}
              value={selectedCountry}
              onChange={handleCountryChange}
              renderInput={(params) => (
                <TextField
                  {...params}
                  label='Select a country'
                  variant='outlined'
                />
              )}
              renderOption={renderOption}
            />
          </>
        }
      />
    </div>
  );
};

const countries = [
  { label: '--select country--' },
  { label: 'South Korea' },
  { label: 'United States' },
  { label: 'Japan' },
  { label: 'Germany' },
  { label: 'new country' },
  // Add more countries here
];

const top100Films = [
  { label: 'The Shawshank Redemption', year: 1994 },
  { label: 'The Godfather', year: 1972 },
  { label: 'The Godfather: Part II', year: 1974 },
  { label: 'The Dark Knight', year: 2008 },
  { label: '12 Angry Men', year: 1957 },
  { label: "Schindler's List", year: 1993 },
  { label: 'Pulp Fiction', year: 1994 },
  // Add more movies
];

export default App;
* reference
https://mui.com/material-ui/getting-started/installation/
'React > Basic' 카테고리의 다른 글
| React Hook - useState (0) | 2023.07.23 |
|---|---|
| React Hook 알아보기 (0) | 2023.07.23 |
| 'React' must be in scope when using JSX (0) | 2023.04.15 |
| React - vscode에서 React개발을 위한 Prettier, ESLint설정 (1) | 2023.04.15 |
| React - EC2에서 React 환경 구축하기 (0) | 2023.04.14 |


